Go to File » Setup tables » System » Parameters » [Display] tab and enter a description for the Table d'hôte, usually TDH
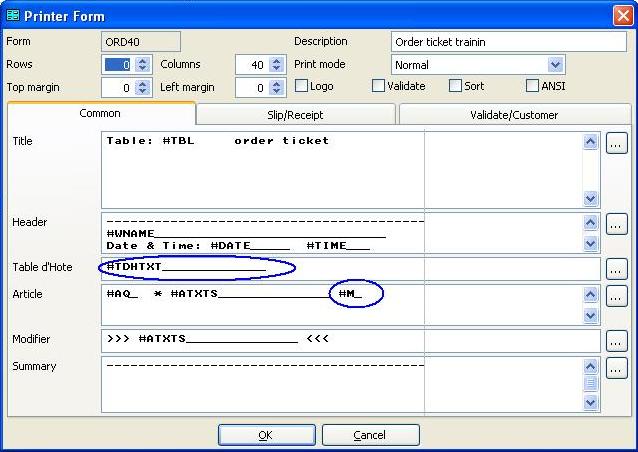
Go to File » Setup tables » Management » Printer forms and open the printer form that you would like to change. Show me
-
Right click in the Table d'Hôte block and add the "Table d'Hôte description" variable.
-
Right click in the Article block and add the "Table d'Hote indication" variable. Try to keep the variable #m__ as short as possible.
Go to File » Setup tables » Articles:
-
Create all articles that are available as a table d'hôte menu item. These are normal articles that can be sold outside of the Table d'Hôte menu (article type = revenue).
-
Create article's like "No Starter", "No Main", "No Dessert" (article type = revenue and a price of 0.00).
-
Create one or more articles "Surcharge Menu" in case there are items on the menu that have a Surcharge amount (article type = revenue and a price of 0.00).
Go to File » Setup tables » Course menu and create all course that are available in your menu's.
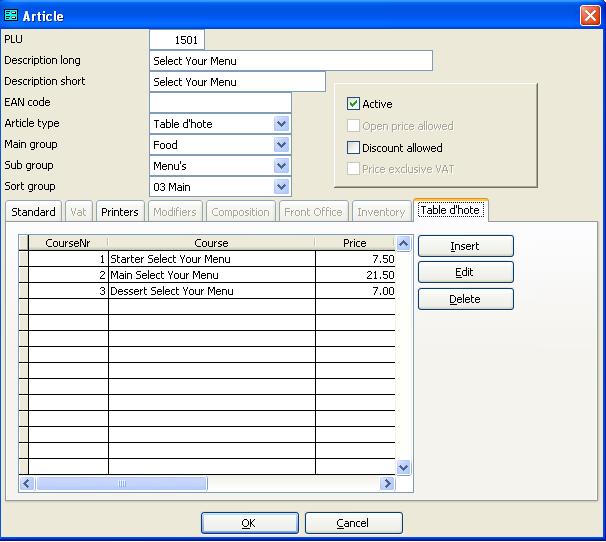
Go to File » Setup tables » Articles and create an article for the Table d'Hôte Menu (article type = "table d'Hôte") and add the courses that are part of this menu on the "table d'Hôte" tab page. Show me
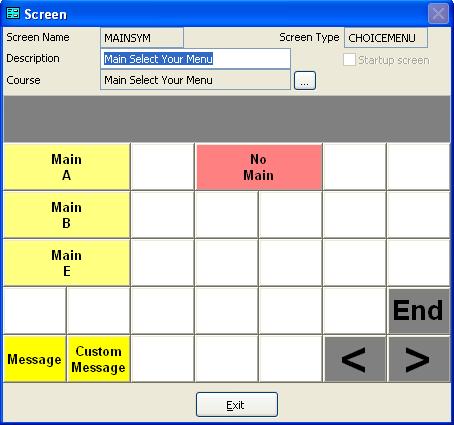
Go to File » Setup tables » Screens:
-
On one of the screens, create a button for the Table d'Hôte Menu article you created in step 5.
-
Create a screen for each of the courses you configured in step 4 (Screen type = "ChoiceMenu") and select the course where the screen will be linked to. Then add a button for all the articles where the customer can select from (you can only add the articles that are linked to the selected course). If required, also add buttons for: Message, Custom Message, Choice menu previous course, Choice menu next course, Choice menu end. Show me
Send the data to the terminals to test the table d'Hote Menu.